-
ArtRage and Spoonflower
Expanding rather than enlarging: creating a seam allowance on an original sewing pattern.
Spoonflower print-on-demand fabrics (is SO MUCH FUN!) occasionally runs a design contest in which the challenge is to create a complete sewing project for printing on a single 18 x 21 piece of fabric. A winner would be someone whose idea not only clearly makes an exciting end product, but whose placement and incidental designs make the unfinished fabric a piece of art on its own.
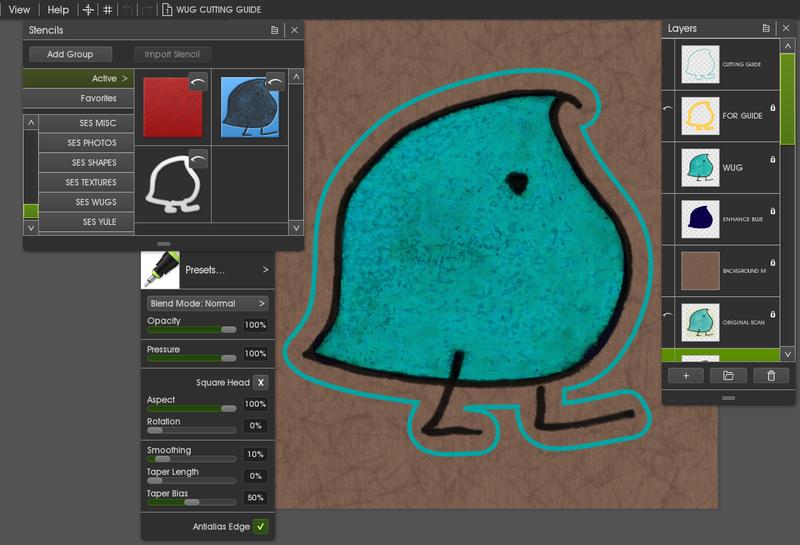
Showing the cutting lines around each piece to be sewn is easy in ArtRage by using stencils to expand the edges of the design. I make a stencil of the original shape and set the stencil to guide mode. I like using Guide Mode because I have better control: I can work with the stencil inverted as well as the original and have the same result.
I then trace along the stencil guide with the pen set to twice the width I want as the distance between the cutting line and the pattern. It doesn't matter what color I choose because I'm creating this outline on its own layer for no other purpose than to create another stencil I'll trace on a third layer. In this example I used yellow set at 100% size. That means the seam allowance or distance between pattern edge and cutting line, will be equivalent to a pen width of 50%.
I then trace the stencil of the enlarged outline with the pen set for the line width I want for the finished outline. In this case, the turquoise outline is size 12%.
I use a bit of smooth in the pen settings to make sure the lines settle nicely into place; 5 or 10% depending on how iffy my original line was.
Example shown: (part of) make a pillow for a linguist; WUG design adapted from 1958 illustration by Jean Berko Gleason, The Pioneer in Psycholinguistics.
-
That is pretty neat! It's like the 'offset' feature in some programmes. Thank you for this input!
 Posting Permissions
- You may not post new threads
- You may not post replies
- You may not post attachments
- You may not edit your posts
-
Forum Rules


 Reply With Quote